There’s something uniquely satisfying about taking on a DIY project—envisioning the final result, problem-solving along the way, and finally standing back to admire the fruits of your labor. Over the years, I’ve tackled my fair share of projects, from simple home décor upgrades to furniture restorations. But one stands out as the most ambitious undertaking: completely renovating an old, neglected room into a cozy, functional workspace.
The Challenge: A Room in Ruins
When I first laid eyes on the space, I knew I was in for a challenge. It was a small, outdated room in my home that had long been neglected, filled with clutter, and bearing years of wear and tear. The walls were covered in old, peeling wallpaper. The flooring was a disaster—partially ripped-up linoleum exposing uneven wooden planks underneath. The room lacked proper lighting, and the windows were drafty.
But in my mind, I saw potential. I wanted to transform this neglected space into the perfect home office—an inspiring, productive environment where I could read, write, and work without distractions.
Planning and Prepping: The Blueprint for Success
Before diving in, I knew I had to plan thoroughly. I started with a budget, gathering estimates for supplies and tools I didn’t already own. I sketched a rough layout of how I wanted the space to function, factoring in furniture placement, lighting, and storage solutions.
Then, I spent hours researching the best ways to remove stubborn wallpaper, level a floor, and install new lighting fixtures. I watched countless DIY tutorials, read home improvement blogs, and consulted with knowledgeable friends.

Demolition: The Mess Before the Magic
The first step was clearing out the room. This alone took a full day, as I had to haul out old furniture, discard unusable junk, and sort through items worth saving. Then came the real challenge: removing the wallpaper.
I quickly realized that wallpaper removal is one of the most tedious tasks in DIY renovations. Some areas peeled off easily, while others stubbornly clung to the wall as if they were welded on. Armed with a wallpaper steamer, a scraper, and an endless supply of patience, I slowly worked my way across every inch of the walls. It took hours, but finally, I was left with a bare canvas.
Repairing and Rebuilding: Laying the Foundation
Once the walls were exposed, I discovered multiple cracks and holes that needed patching. I applied joint compound, sanded it smooth, and primed the walls in preparation for painting.
The floor, however, was another story. The uneven wooden planks needed significant attention. I had to fill in gaps, reinforce weak spots, and finally install a fresh layer of laminate flooring to give the space a clean and polished look.
Bringing the Room to Life: Paint, Lighting, and Details
Choosing the right paint color was a crucial decision. I opted for a calming, warm-toned gray that would complement any décor and provide a neutral backdrop for creativity. The transformation was instant—fresh paint made the room feel bigger, cleaner, and brand new.
For lighting, I swapped out the old, dim fixture with a sleek, modern LED pendant light. I also installed LED strip lighting under shelves and placed a cozy lamp on the desk for a softer glow during late-night work sessions.
Next came the fun part—furnishing and decorating. I added floating shelves for extra storage, repurposed an old wooden desk by sanding and refinishing it, and found the perfect ergonomic chair. A few houseplants, framed art, and personal touches made the space feel truly mine.

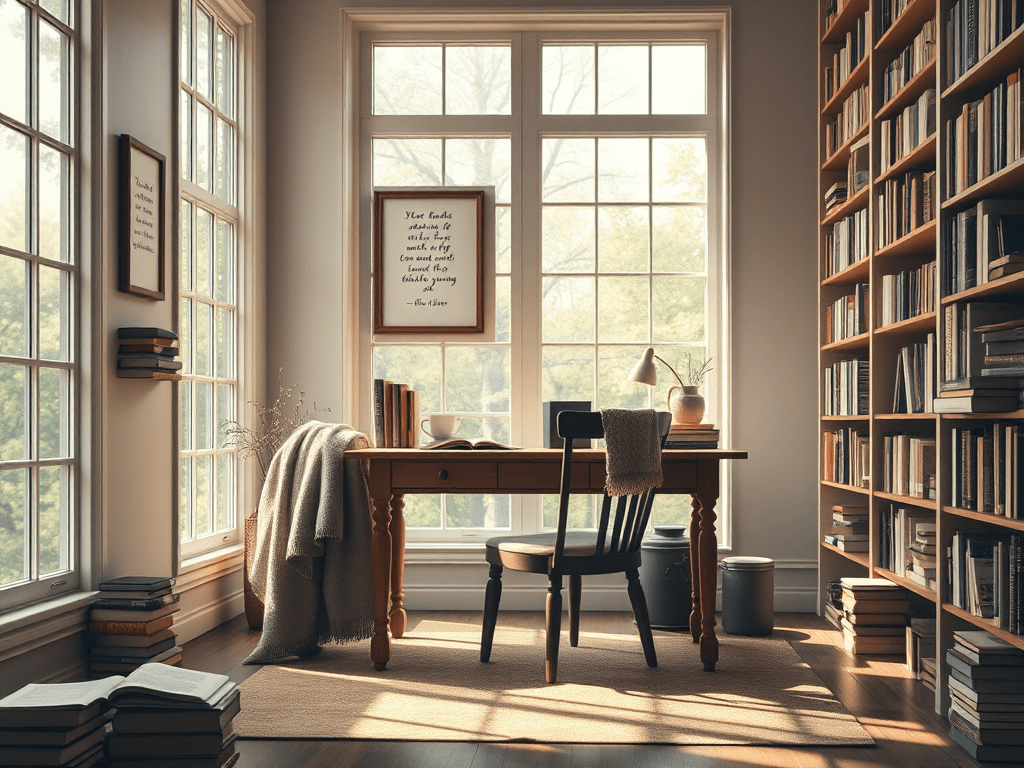
The Final Result: A Space of My Own
After weeks of hard work, I finally had the home office I had dreamed of. What was once an outdated, forgotten room had become a functional and stylish workspace, perfectly tailored to my needs.
More than just a renovation, this project taught me patience, perseverance, and the power of learning new skills. There were moments of frustration—when the wallpaper wouldn’t budge, when I miscalculated flooring cuts, or when I accidentally spilled paint on my jeans. But in the end, it was worth every effort.
Looking back, this DIY project remains one of my proudest achievements. Not only did I create a space I love, but I also proved to myself that with determination and a willingness to learn, I could take on challenges that once felt impossible.
Would I do it again? Absolutely. And next time, I might just take on something even bigger.
Have you ever tackled a DIY project that pushed your limits? Let’s hear about it!